

While starting the emulator itself you can pass the dns servers and your http proxy server credentials as parameters to the 'emulator' start command. So the command looks likes this.
emulator -avd-dns-server -http-proxy -debug-proxy
So the real command may look like:
HVGA is a example device nameemulator -avd HVGA -dns-server 208.56.45.23, 209 .34.45.23 -http-proxy http://192.168.10.2:8080 -debug-all
In the place of for dns servers, you can enter upto 4 dns server address separated by commas.
In the place of you can use the ip address of your proxy with the Port number to connect to it.
If you got username and password to connect to your proxy server for authentication. You have got provision for that too. In the command you must pass your username and password as
-http-proxy http://username:password@192.168.10.2:8080
You can also pass -debug-all or -debug-proxy to get the error report of the connection.
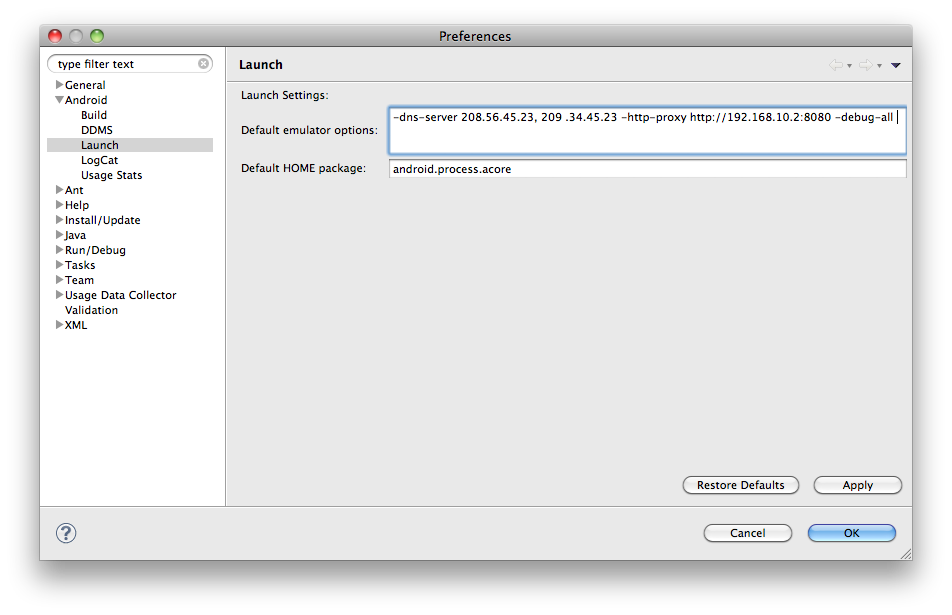
If you are using Eclipse IDE for your development, then you need to supply this parameters in
Eclipse Preference -> Android -> Launch -> Default Launch Options.
That's it, now you can start your emulator and find Internet is connecting to it.
You can also set the proxy address and dns server details in your emulator by another way.
By default, Android SDK searches for the DNS server details from resolv.conf file.
On Linux and OS X, the emulator obtains the DNS server addresses by parsing the file /etc/resolv.conf. On Windows, the emulator obtains the addresses by calling the GetNetworkParams() API. Note that this usually means that the emulator ignores the content of your "hosts" file. (/etc/hosts on Linux/OS X, %WINDOWS%/system32/HOSTS on Windows).
So first make sure that resolv.conf file is present in the desired location, if not make a symbolic link of the fie to the location where the device searches for the resolv.conf file.
To find the present location of the resolv.con file use the following command.
locate resolv.conf
It will list few matched files, choose the one which you want. The contents of the resolv.cof file will be some thing like this.
#
# Mac OS X Notice
#
# This file is not used by the host name and address resolution
# or the DNS query routing mechanisms used by most processes on
# this Mac OS X system.
#
# This file is automatically generated.
#
domain TWOZAO
nameserver 203.145.184.32
nameserver 192.168.10.1
Make a symbolic link to this file from /etc.
ln /path/to/current/resolv.conf /etc/resolv.conf.
Now you made your emulator to find the DNS servers and you can set the proxy
address in your device, Go to Menu -> Settings -> Wireless & Network
Settings -> Mobile Networks -> Access Point Names.

There you can select the APNs and you can fill the proxy address and its port number, username and password there.
 |


